Sunday, 22 September 2013

Lanterns for a Silver Anniversary Party

It was my Brother and his wife's 25th Wedding Anniversary in August, and I offered to make some lanterns to hang around the garden.


There was plenty of inspiration on the internet and Pinterest. However I decided to personalise the lanterns using my trusty Silhouette SD to make a stencil, and some etching cream to etch the design into the glass.

As it was a Silver Wedding, I used Silver ribbon to decorate and hide the wire used for the handles. and I found some silver coloured granules to put in the bottom of the jars. I also had a bit of brainwave and applied a thin layer of glue and sprinkled glitter onto the stencil, before peeling the stencil off. I think it turned out rather well.


The twinkly effect of the glittered lanterns was lovely with the candles lit as the sun went down.

Sarah xx

 .

Sunday, 21 July 2013

T Shirt -Re-Size and The London Film and Comic Con

Recently we had a family day out to the London Film and Comic Con. My daughter is the enthusiast for all things Manga etc.,  It was a good day, lots of people were dressed in costume and we enjoyed seeing some Cosplay and memorabilia from various films.

I love the look on this lady's face as she met Alien!

There were also lots of famous people from films signing pictures, notably David Hasslehoff,  'The Smoking Man' from The X files and Danny Glover, from Die Hard etc.,  Lots of Star Trek and Sci Fi Movie stars was there and there were people giving talks, we sat in on the man who voices the Mario Brothers!!! (we needed a rest at that point, but it was interesting).

My daughter wanted a few souvenirs of the day and we bought a few bits and pieces including a manga book and a couple of T-shirts, one of which was a bargain at £2 because all they had left were X-Large!  I suggested we buy one, because I could make it smaller for her... hence this post.

X-Large
I did some research and found a really good tutorial on pinterest
 T-Shirt Resizing

I was a bit hesitant about cutting into the T-Shirt, but I considered it wasn't a lot of money to waste if it all went wrong and chopped away! As you can see, quite a lot of fabric needed removing. This method also allowed us to preserve the Logo on the sleeve, which I thought we may have lost otherwise

I zig-zagged all the seams as suggested and zig-zagged the hem as well, and I and my Daughter are really pleased with the results.

Just Right

Sarah xx


Sunday, 16 June 2013

Strawberry Fayre And Even More Peg Bags

Me and my neighbour had a stall today at the Annual Strawberry Fayre. I don't get much time to make stock, but after the success of my recent peg bags, I made a few extra ones to hang on the stall.

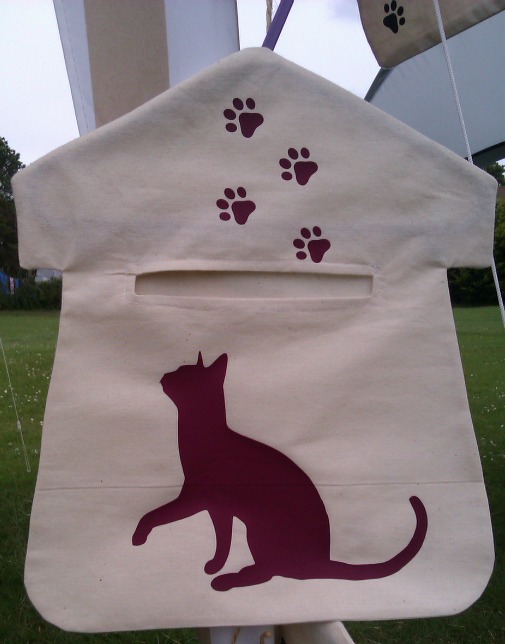
Lucky Black Cat

Campervan

Green Beach Hut

Pink Beach Hut

Mauve Cat

The Pink Beach Hut sold has soon as we had set up the stall, to the stall holder next to us.  And then the Camper Van, Green Beach Hut and the Butterfly!  I would have been chuffed to sell 1, so was over the moon to sell 4!

I also sold some other bits and pieces including a needle case, Hanging Heart with a tilda-esq bunny on it and a felt birdie.  I never seem to sell much at these fayres, but I did almost quite well today!

My neighbour sells hand made Jewellery and did very well as usual.

Here's a picture of my half of the stall.


Despite the rain and it drizzled and poured over the afternoon, it was overall, a successful afternoon.

Sarah xx

Sunday, 2 June 2013

A Ruby Wedding Gift

It was my very good friend and (Bon Jovi) Tour Buddy's Ruby Wedding Anniversary last weekend, and I decided to take her some flowers!

I bought a plain glass vase from Ikea, and etched it with some Amour Etching Cream.  Using my Silhouette SD to cut out a stencil from vinyl, it was quite tricky applying it to the curved surface, but I managed.

Difficult to see Etching

I've taken a photo, but I forgot to take a picture before I arranged the flowers in the vase, so its a bit difficult to see the etching.


I added some ruby red glass pebbles to the bottom of the vase and finished it off with a tag made with a lovely Ruby Red Rose Print from the Graphics Fairy.


In return for her lovely Flowers in an personalised etched vase,  I was treated to a lovely home raised spit roasted Lamb Dinner at her Ruby Wedding Party held in the Barn at her Farm!

Gorgeous Flower

Sarah XX

Sunday, 19 May 2013

Colour Blocked T Shirts

Whilst browsing the fabulous Pinterest recently I came across this blog post for making your own Colour Block T-shirts which had been pinned, I dutifully re-pinned and went shopping.

I bought my T shirts from H & M for £3.99 each. I have a colour block T shirt previous purchased also in H & M for £9.99 which I love and have worn to death.


I cut the T Shirts using my rotary cutter and pinned and sewed the two halves of each t-shirt together using the zigzag stitch as suggested in the original post.

Please excuse my tubby tummy, I'm working on reducing it!

I gave the seams a quick press with an iron and hey presto I now I have 2 lovely Colour Blocked T-shirts.


Sarah xx


Sunday, 12 May 2013

More Peg Bags

The ladies in my office wanted Peg Bags made. As they are both dog owners and always talk enthusiastically about their dogs, I decided to make the Peg bags doggy themed.

Labrador
I made the Peg Bags out of plain cotton calico and cut the dog shapes out of flocked vinyl with my Silhouette SD machine. I found the dog pictures on the internet and traced them with the Silhouette software and not wanting to waste the excess vinyl around the dogs, I cut out some paw prints too, just to add an extra something to the bags. I have also Ironed a couple of paw prints to the back.

Border Collie
I made an extra peg bag whilst I was at it, and cut a butterfly out of normal T-shirt vinyl, again I cut the smaller butterflies to use up the excess vinyl. The black vinyl is layered on top of the green vinyl

Butterfly
The ladies were both very pleased with the Peg Bags, especially as the dogs were the same breed as their actual dogs. The butterfly peg bag will go into my craft stall stock!

Sarah xx

Sunday, 5 May 2013

Beach Hut Peg Bag

We need a new peg bag! The old one is a bit weathered and the pegs keep falling out of it!

I have made peg bags before, so I looked out my old pattern, which I had previous drawn up.  However, being me, I decided to make something new!

I've always liked the Beach Hut as a quirky design, so decided to base the Peg Bag on it.


I used some stripy fabric and did a bit of applique for the door and life ring (buoy), I made the roof separately and stitched it on after I had stitched the bag together.


I think I need to make it look a bit more beach hut like, at the moment, its a bit Garden Shed, except for the life ring, perhaps a Bucket and Spade would help, or some pastel colours.

However its is perfectly functional the way it is, and my husband and daughter said it looks like a beach hut.

Sarah xx